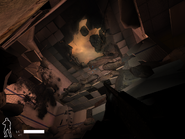
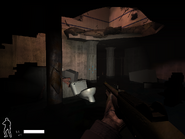
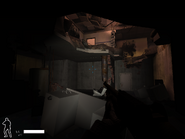
Department of Agriculture is the fourth mission in SWAT 4: The Stetchkov Syndicate and the thirteenth mission in SWAT: Elite Force. The SWAT team is needed to deal with frustrated farmers that attempted to bomb the Brewer County Department of Agriculture with Improvised Explosive Devices. One bomb had already detonated prematurely and caused signifcant damages to the building including a fire, while the ensuring commotion allowed the police to trap the farmers within the building along with innocent office workers.
Mission Briefing[]
Okay, quiet down and listen.
The Department of Agriculture has its local offices in the Government Plaza on Geddy Avenue. Approximately 50 minutes ago the building was entered by a group of suspects armed with assault rifles and Improvised Explosive Devices, IEDs.
It appears their plan was to raid the office, plant the bomb and then escape, but someone messed up. The bomb detonated prematurely causing a fire on the lower floor. The fire department attended and tried to contain the fire, but they didn't realize the bad guys were holding hostages on the upper floors. When the fire crew were shot at, they retreated and called the local precinct who called the negotiation team.
It seems these guys are local farmers who have a beef with the government's policies on genetically-modified crops. They appear far better armed than your average farmer. Spotters have reported seeing them carrying M1s and wearing body armor - somebody has sold them their gear, probably the same somebody who sold them the explosives they used.
The negotiators haven't made much headway here. They've traded two hostages for two gas masks, but other than the occasional anti-government rant, contact with the suspects has been minimal.
They haven't made any direct threats against the hostages but we're assuming their intent was to empty the building and then destroy it. But considering the clumsiness of their actions so far, we're not waiting for them to make another mistake and get someone killed.
Choose your gear and get ready to deploy.
Timeline[]
- 17:12: Suspects Enter Building - A group of suspects armed with assault rifles and Improvised Explosive Devices enters building
- 17:19: Bomb Detonates - One of the bombs detonates prematurely causing a fire on the lower floor.
- 17:26: Police Units Arrive - First police units arrive.
- 17:41: Fire Crews Arrive - Fire Crews Arrive.
- 17:48: Rescue Crew Fired Upon, SWAT Called - Fire under control, rescue crew fired upon.
- 17:59: Tactical entry begun - Swat officers make tactical entry
Entries and Snipers[]
This map offers two entry points: a main entrance on first floor at side 1 and a rear entrance on the second floor at the coner of side 2 and side 3. Both entry points will inevitably lead the player to the first of the six bombs that must be defused, thereby introducing them to the additional objective of disarming all the bombs.
One sniper assists the officers in this mission. Sierra 1 is covering the archives on the second floor at side 4.
Map Layout[]
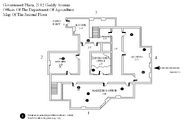
Depite the detailed floor plans provided by the intel, a major error managed to slip into the team's briefing - the floor plan was flipped horizontally, with the rooms labeled on side 2 actually located on side 4, and vice versa. Also the bomb detonation managed to ruin the interior of the building, meaning the cleared hallways that exist in the intel will be blocked or damaged by the time the mission begins. Finally the intel did not provide any info on the basement level, nor the clutters that fills the bigger rooms on the second floor.
The Department Of Agriculture is a two story building plus a basement level and as the name says it administers federal programs related to food production and rural life. The building is a part of the Government Plaza that has been built in the 50s and has been retrofitted several times and it's principal duty is to aid farmers, but it also serves consumers through its food-assistance and food-inspection programs. The first floor is less complicated as contains offices such as reception area, storage space, restrooms and conference room and is more linear whereas the second floor contains marketing office, archives, accounting, kitchen, lounge and has one looping hallway surrounded by offices from all sides. The basement level is mainly a parking garage and a maintenance space. There are three entrances to the building: one through the main entrance at reception on the first floor on side 1, one entrance at the lounge on the second floor on the side 2, and one through the garage in the basement also located on side 1. There are also three stairways that connect all the floors. The whole department has many agricultural posters that show methods of improving agriculture and people's lives, especially farmers, using better equipment to fertilize the soil. They also show cooperating companies such as Sonmanto but also various facts for example about GMO.
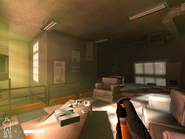
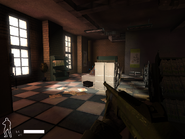
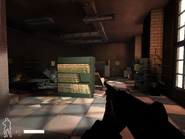
The building's layout, after the explosion, can be roughly described as a bomb crater in the middle where restrooms and one office once stood with the still intact hallways and offices surround it. The first floor forms a linear path from the basement stairs at side 4, to the reception area at side 1, then to the lounge stairs on side 3, while cutting across the conference room on side 2. The second floor has a circular hallway that surrounds the bomb crater, with the big marketing office attached to the hallway on side 1, the kitchen for employees on side 2, the lounge room for applicants/guests and accounting office on side 3, and the large regulation office connected to archives filled with many reports on side 4. The basement is divided into two large sections, with the flooded garage on side 1 and the destroyed maintenance area on side 3, plus a small storage room squeezed between them. Finally the stairs can be located at the back of the lounge room that connects all three floors, at the reception area that connects the first and second floors, and at the corner of side 1 and side 4 that connects the first floor with the parking garage.
There are few important things to note about this map. First, given the damaged state of the building, the hallways that surround the bomb crater will be exposed to the suspects waiting on the other floors - especially the corridor on the first floor with destroyed restrooms. Second, the offices, like archives or marketing office on the second floor tend to be extremely large with two or more entrances. Third, the lounge room stairway will be exposed to the lounge room on the second floor via the balcony. Finally, the explosion dimmed the whole building due to lack of electricity, especially the basement and therefore making it much harder to see clearly.
Tactical Approach[]
Suspects on this map are heavily armed with combat shotguns, machine pistols and submachine guns, along with occasional body armors and gas masks. However, skimping on CS Gas grenade is not recommanded given the cluttered and scarred nature of this map.
Regardless which entry point the player took, the entrances at the first floor reception and the second floor lounge will always contain a bomb which immediately triggers the additional objective to disarm six bombs within 14 minutes and 6 seconds. As such, the player should focus on disarming the bombs rather than gaining control of the map or subduing the civilians. Until all bombs are disarmed, do not waste time to clear the rooms one by one, instead follow the bomb's beeping sound from the hallways and clear rooms only when a bomb's location is confirmed. In the event that a suspect surrenders while locating the bombs, while it is prudent to cuff them to prevent escapes, chase them to other floors is definitely an unnecessary distraction. Given that the hallways within the building are exposed by the bomb crater, the player should walk as far away from the edge as possible to lessen the risk of distractions and suprises from the other floors.
As for clearing the rooms, the large offices on the second floor will require multiple grenades to be tossed in simultaneously to ensure adaquate coverage. Making use of the hold/initiate order feature with the teams while manually toss in a third grenade is a necessary skill to master here. Also it is a good idea to clear the lounge room from the second floor instead of the stairs from the first floor. This will prevent the player from coming under fire from the balcony above.
The Night Vision Goggle that the player can unlock on this mission will only be situationally useful in the basement level and it may also be considered unnecessarily harmful since it provides no head protection.
Changes in Elite Force[]
- The suspects now carry XDM pistols and Benelli M1 Super 90 shotguns in addition to their default loadouts. They also wear a class of medium body armor that offers more protection than the vanilla light armors worn by all other suspects.
- All suspects' morale have been lowered.
- All civilians' morale have been slightly raised so that they all have a good chance to resist compliance. Rita Winston's max morale has been slightly lowered, however.
- Restored a cut conversation that may have appeared irrelevant. The cut conversation mostly emphasises on the number of bombs present in the map.
- Corrected loading screen for the sake of consistency with other missions.
- This map unlocks the SG552 Commando and its suppressed variant instead of the Night Vision Goggle.
Trivia[]
- The playthrough of this map is heavily reminiscent of The Wolcott Projects and the Old Granite Hotel missions of the original game. This is due to the scarred nature of the map and the bombs that need to be disarmed.
- As with every other mission in SWAT 4: The Stetchkov Syndicate, the plot of this mission largely binds itself with the plot-lines of the missions both preceding and succeeding it. The suspects of this mission were obviously offered arms and equipment by the primary antagonists of the expansion pack which is heavily implied throughout. Even some suspects might say upon arresting that they shouldn't have bought "Euro-trash" in a reference to the IEDs and the fact that Stetchkov clan's origin is from Bulgaria.
- Even though the TOC says that one of the firefighters saw six gunmen carrying the bombs and SWAT officers says that there are 4 remaining (one disarmed and one detonated), there are actually five bombs in the department that need to be disarmed which means there were seven bombs in total.


